
Exposure in Photography Explained
Exposure is one of the most important concepts in photography.
Have you ever taken a picture that was either way too bright or way too dark? All of that has to do with exposure. Whether you’re using a DSLR, mirrorless camera, or just your smartphone, getting the exposure right makes all the difference between a stunning shot and one that falls flat. In this guide, I’ll break down what exposure is, how to control it, common mistakes like overexposure and underexposure, and my top tips for nailing exposure every time.
What is Exposure?
Exposure refers to the amount of light that reaches your camera’s sensor, determining the overall brightness or darkness of an image. A well-exposed photo maintains a balance between highlights and shadows, ensuring details aren’t lost to overexposure (too bright) or underexposure (too dark). The key is to control light capture while preserving detail in both bright and dark areas.
The Exposure Triangle: Aperture, Shutter Speed, and ISO
Exposure is controlled by three main settings, often called the Exposure Triangle:
- Aperture (f-stop) – Controls how much light enters the camera through the lens. Aperture also affects depth of field, or how much of the photo is in focus. A wider aperture (lower f-stop number) allows more light in, while a smaller aperture (higher f-stop number) lets in less light.
- Wide aperture (e.g., f/1.2): Lets in more light, creating a brighter image and a shallow depth of field (blurry background).
- Narrow aperture (e.g., f/16): Lets in less light, resulting in a darker image and a deep depth of field (everything in focus).
> A wide aperture lens like the Canon RF 50mm f/1.2 lets in more light and creates a creamy background blur.
- Shutter Speed – Determines how long your sensor is exposed to light. Shutter speed controls motion in your images. A faster shutter speed will freeze motion, while a slower shutter speed allows more light in but can create motion blur.
- Fast shutter speed (e.g., 1/2000s): Freezes motion but darkens the image.
- Slow shutter speed (e.g., 1/30s): Lets in more light but can cause motion blur.
- ISO (Exposure) – ISO controls how sensitive your camera’s sensor is to light. A low ISO results in cleaner images with less noise, but it requires more light. A higher ISO brightens the image mechanically but can introduce grain or noise.
- Low ISO (e.g., 100): Produces cleaner images with less noise but requires more natural light.
- High ISO (e.g., 3200+): Brightens the image by increasing the sensor’s sensitivity to light, but can introduce grain or noise.
> For low-light shooting, I recommend cameras like the Canon R5 or Sony A7 IV — they handle high ISO beautifully with minimal noise.
Balancing these three elements allows you to achieve a well-exposed photo, whether you’re shooting in bright daylight or low-light conditions.
Adjusting Exposure on a Smartphone
Even without a DSLR or mirrorless camera, you can still adjust exposure on a smartphone. While smartphones may not offer full manual controls, they do allow you to tweak exposure settings for better lighting. Here’s how:
1. Adjust Exposure Manually
Tap on your screen to focus, then slide the brightness up or down to control exposure.
2. Use Pro Mode (if your phone has it)
Some smartphones have a manual mode where you can adjust ISO and shutter speed just like on a DSLR.
3. Turn on HDR Mode
HDR (High Dynamic Range) helps balance exposure by merging multiple shots at different brightness levels.
Pro Tip: Avoid zooming in digitally, as it lowers quality. Instead, move closer to your subject if possible.
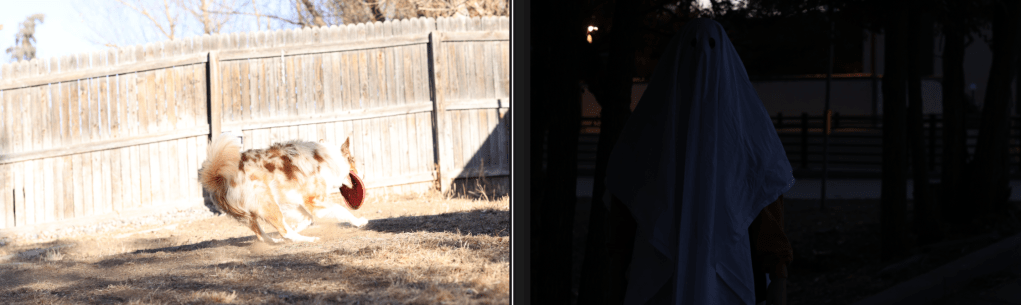
Overexposure vs. Underexposure: What’s the Difference?
Understanding overexposure and underexposure is key to mastering exposure in photography.
Overexposure (Too Bright)
Overexposed images occur when too much light hits the sensor, causing bright areas to lose detail. This results in blown-out highlights that lack texture and color, making parts of the photo appear washed out.
Fix it by:
- Lowering ISO
- Using a faster shutter speed
- Increasing your f-stop (narrowing the aperture)
- Adding a neutral density (ND) filter if shooting in bright conditions
Underexposure (Too Dark)
Underexposure occurs when too little light reaches the sensor, resulting in a photo that is too dark with little to no detail in the shadows.
Fix it by:
- Increasing ISO (but watch for grain!)
- Slowing down shutter speed (use a tripod if needed to prevent camera shake)
- Using a wider aperture (lower f-stop number)

Common Exposure Challenges
1. Shooting in High-Contrast Scenes
When photographing scenes with both very bright and very dark areas, such as a sunset or a backlit portrait, it can be challenging to capture all the details. In these cases, consider using:
- Exposure Bracketing: Take multiple shots at different exposures and combine them later in post processing.
- Spot Metering: Measure light based on a specific area in your frame.
2. Low-Light Photography
In dim environments, it’s tempting to crank up the ISO, but this can introduce noise. Instead, try:
- Using a tripod for longer shutter speeds to allow more light to hit the sensor without adding camera shake.
- Opening up your aperture for more light (use a lower f-stop).
- Adding artificial light (like a flash or external lighting).
3. Bright, Sunny Conditions
Bright, sunny conditions can lead to overexposure. To prevent this:
- Use a faster shutter speed to let less light into the camera’s sensor.
- Narrow your aperture (increase f-stop).
- Attach a neutral density (ND) filter to your lens to reduce the amount of light entering the camera and hitting your sensor.
My Best Tips for Perfect Exposure
1. Use the Exposure Meter
Most cameras have an exposure meter (a scale from -3 to +3). Aim for 0 or slightly underexposed to avoid losing details in highlights.
2. Check the Histogram
A histogram helps you see if your image is too bright, too dark, or just right. A balanced histogram has peaks spread across midtones, rather than being crammed to the left (too dark) or right (too bright).
3. Shoot in RAW
Shooting in RAW captures more detail and gives you more flexibility to adjust exposure in post-processing without losing quality.
Shooting in RAW instead of JPEG can help preserve more detail; check out my guide on RAW vs JPEG.
4. Try Exposure Bracketing
Your camera can take multiple shots at different exposures—great for tricky lighting situations like sunsets.
5. Shoot in Manual Mode
If you’re comfortable with it, shooting in manual mode gives you full control over shutter speed, aperture, and ISO. This way, you can adjust each setting to achieve the best exposure for your shot.
6. Adjust ISO
If you’re shooting in low light, you can increase your ISO to brighten the image. Just be mindful of noise, especially with higher ISO settings. If you’re in bright daylight, lower ISO (e.g., 100-400) will keep the image clean.
7. Balance Shutter Speed and Aperture
For portraits, keep your aperture wide (f/1.2-f/4) to let in more light, especially during golden hour. A faster shutter speed (1/200-1/400) helps keep movement sharp. For landscapes, use a smaller aperture (f/8 or higher) for deeper focus, but compensate with a slower shutter speed, and a tripod if needed.
Pro Tip: Avoid Over-Exposing!
When taking photos, it’s always better to trend on the side of under-exposure if you’re unsure. It’s easier to recover details from a slightly darker photo than from one that’s too bright.
Why Mastering Exposure Matters
Mastering exposure in photography is important because it directly impacts the quality and mood of your images. Here’s why it matters:
- Proper Detail and Clarity: Exposure ensures that both the highlights (bright areas) and shadows (dark areas) retain details. If your exposure is off, you might lose textures in bright or dark areas, leading to flat or distorted images.
- Creative Control: Understanding exposure gives you full control over the mood of your photos. Want a dreamy, soft image with blurred backgrounds? Sharp focus and rich detail throughout the image? Or maybe a dark and moody atmosphere with deep shadows? Control your exposure to create the mood you want to portray.
- Avoiding Noise/Grain: If your image is too dark and you raise the ISO to compensate, it can introduce noise, making your photo look grainy. On the other hand, overexposure can result in a loss of color and detail in bright areas. Balancing exposure keeps your image clean and clear.
- Improving Composition: Exposure affects how we perceive your composition. For instance, correctly exposing a sunset or golden hour portrait can enhance the lighting, giving your subjects a warm, flattering glow.
- Consistency Across Shots: Mastering exposure means you can replicate settings for consistent results, especially for projects that require uniformity, like portraits, product photography, or creating a cohesive series of images.
- Enhancing Post-Processing: Starting with the right exposure gives you more flexibility when editing. Photos that are too overexposed or underexposed often lose details that can’t be fully recovered in post-production. A balanced exposure gives you more room to make adjustments later.
Overall, mastering exposure empowers you to take creative control and ensures that you capture your subjects with the perfect lighting and detail.
As you practice, don’t be afraid to experiment with different aperture, shutter speed, and ISO combinations. Over time, you’ll develop an intuitive sense of how to achieve the perfect exposure for any situation.
How to Practice with Exposure
To practice with exposure, start by taking a photo in automatic mode and note the settings your camera uses. Then, switch to manual mode and replicate those settings. From there, begin adjusting your exposure: try increasing it to see how it brightens the image, and decrease it to see how it darkens. Experiment with extreme values, like changing the exposure from 100 to 1000, and observe the difference. When you have a high exposure, try adjusting your shutter speed to see how it impacts the overall image, whether it freezes motion or introduces blur. Keep experimenting to understand how each setting affects the final result.
Final Thoughts
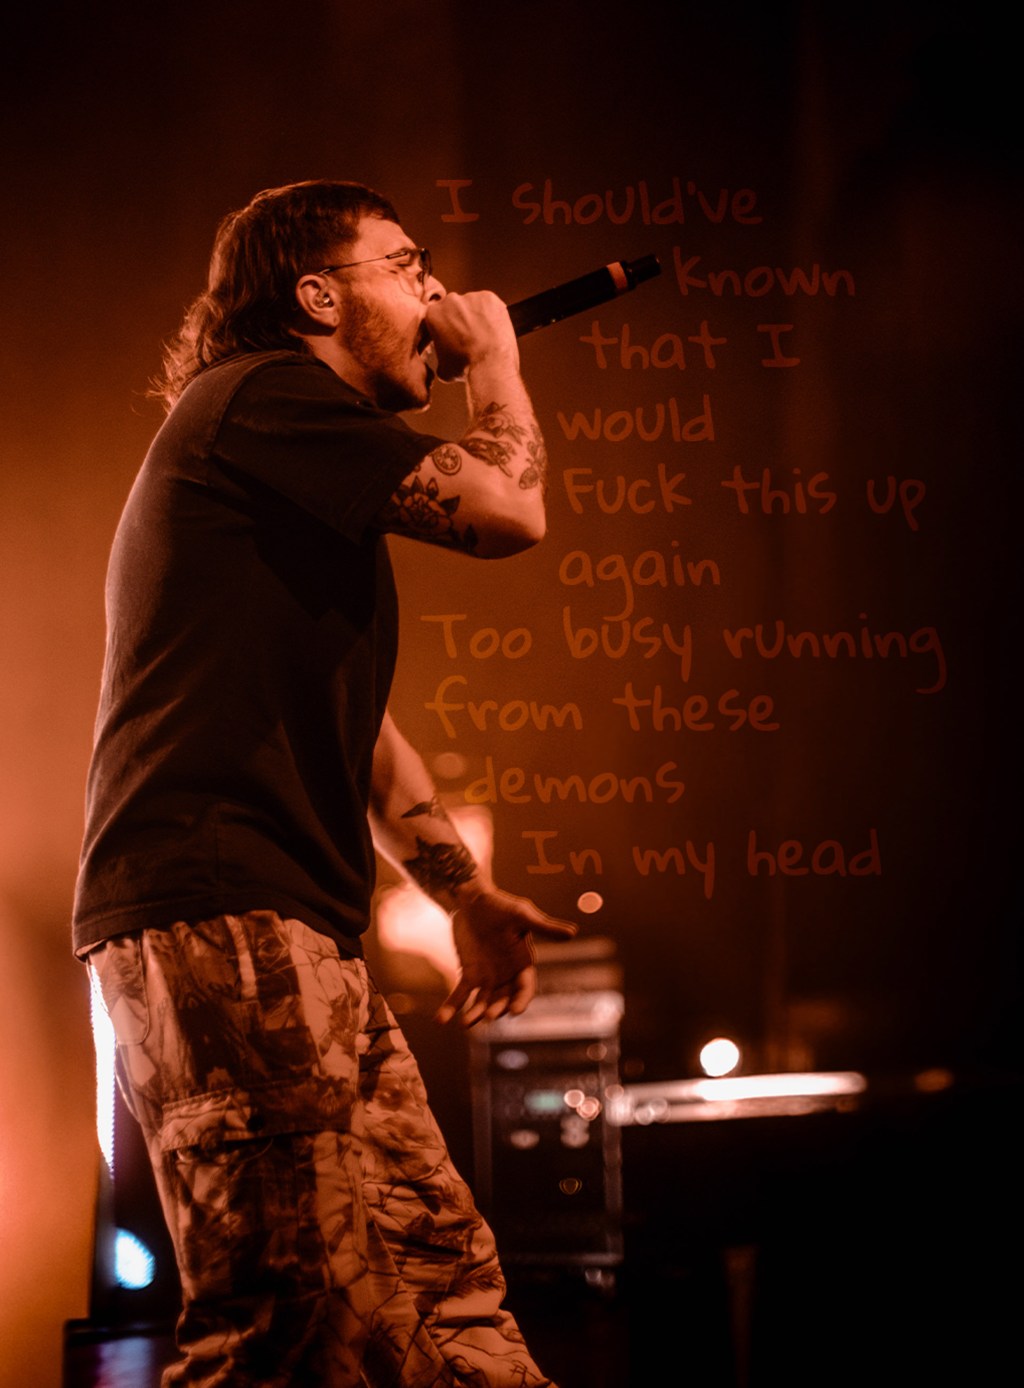
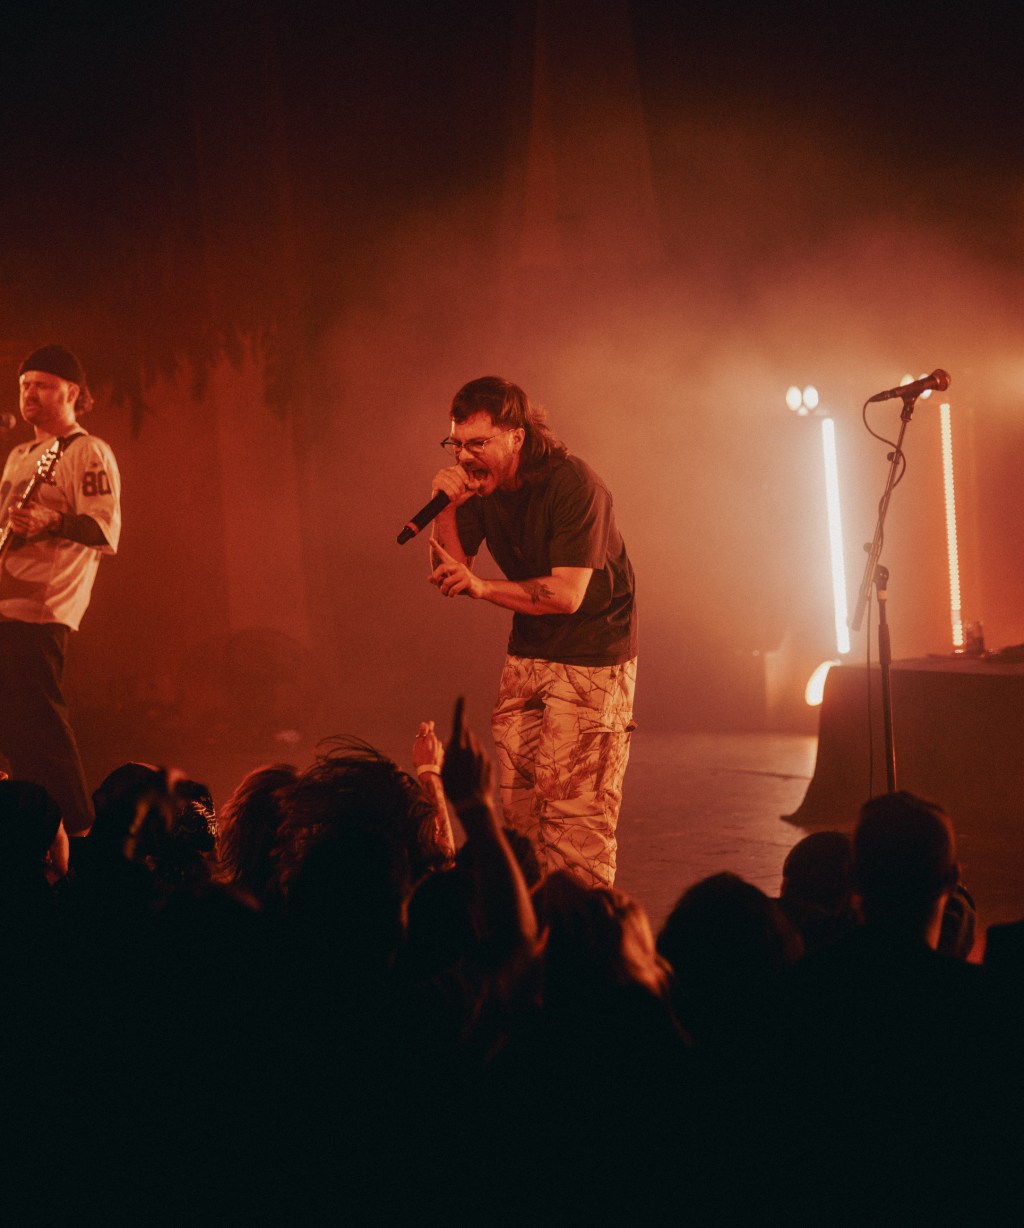
Exposure is the heart of photography, and learning to master it will elevate your skills in any genre — from portraits and landscapes to dirt bikes and concerts. If you’re still unsure about balancing your settings, pick up your camera and start practicing!
Understanding exposure is key to taking control of your photography. Once you master aperture, shutter speed, and ISO, you’ll have the power to adapt to any lighting condition—whether you’re capturing golden hour portraits, fast-moving dirt bikes, or scenic landscapes.
What’s Your Biggest Struggle with Exposure?
Let me know in the comments below—I’d love to help! Or, share your favorite tips for getting perfectly exposed photos!
Any other settings you’re struggling with figuring out? Let me know!
Anyways, thanks for reading :) I hope I taught you something new today!! Have the best day ever, bye!
Related Reads:
- What is Aperture in Photography?
Learn everything you need to know about aperture, one of the most important settings in photography, and how it affects exposure, depth of field, and creative control over your images. - Crop Ratios Explained: How to Choose the Right Aspect Ratio for Your Photos
Learn what crop ratios (aspect ratios) are and how they affect composition, printing, and sharing your photos online. This guide explains common ratios like 3:2, 4:3, 1:1, and 16:9 so you can choose the right crop for every image. - JPEG vs. RAW: Which Format Is Right for You?
Understand the differences between RAW and JPEG, and how it affects exposure and post-processing flexibility. - Golden Hour Photography: The Best Settings & Tricks for Perfect Shots
Learn how to master exposure during golden hour for stunning portraits and landscapes. - Crop Ratios Explained: How to Choose the Right Aspect Ratio for Your Photos
Understand how aspect ratios can affect your composition and exposure framing.


11 responses to “What is Exposure in Photography? (Simple Guide for Beginners)”
I understand the grain and noise in my RAW photos better now. I didn’t catch on why. But after looking back at tuning my ISO during my pics, it fucking hit me why there was grain in the RAW versions l o l. On my phone, the exposure comes in the editing instead of having it be an adjustable setting along with ISO and SPEED. Unless it never was an adjustable setting along those two in the first place lol. Usually after taking pic, I go to the editing settings and quickly mess with lighting, shadows etc. To see if it works out well. Usually, I never liked how they looked. Especially exposure, but I still keep tweaking cause you never know! I know this is very different than an actual camera camera VS a phone camera.
To me, I feel like I’ve done pretty well making sure the subject is lit or dimmed up properly in a way that is acceptable. Regardless, I will continue practicing!
LikeLike
[…] Like Loading… Previous […]
LikeLike
[…] What is Exposure in Photography? […]
LikeLike
[…] What is Exposure in Photography? […]
LikeLike
[…] Loading… Previous […]
LikeLike
[…] Fix Bad Lighting – More pixels won’t fix bad lighting, so make sure you’re also considering exposure when shooting your […]
LikeLike
[…] If exposure settings still feel confusing, I explain them step by step in What is exposure in photography? (a simple guide for beginners). […]
LikeLike
[…] What Is Exposure in Photography? (Simple Guide for Beginners) […]
LikeLike
[…] ISO: I keep it as low as possible (around 100-200) to maintain that sharp, noise-free image. However, as the light starts to fade, you might need to bump it up a bit to keep your shots bright and crisp. 1600 is a good stopping point to avoid grainy photos, but feel free to use a higher ISO when needed.What is Exposure in Photography? (Simple ISO Guide for Beginners) […]
LikeLike
[…] What is Exposure in Photography? (Simple Guide for Beginners) […]
LikeLike
[…] certain areas, leading to a less balanced photo. By tapping, you guarantee a more precise focus and exposure, improving the overall quality of your photo. This small but powerful adjustment can make a […]
LikeLike